How to Write Circular Text in PowerPoint How to Curve Text in PowerPoint YouTube
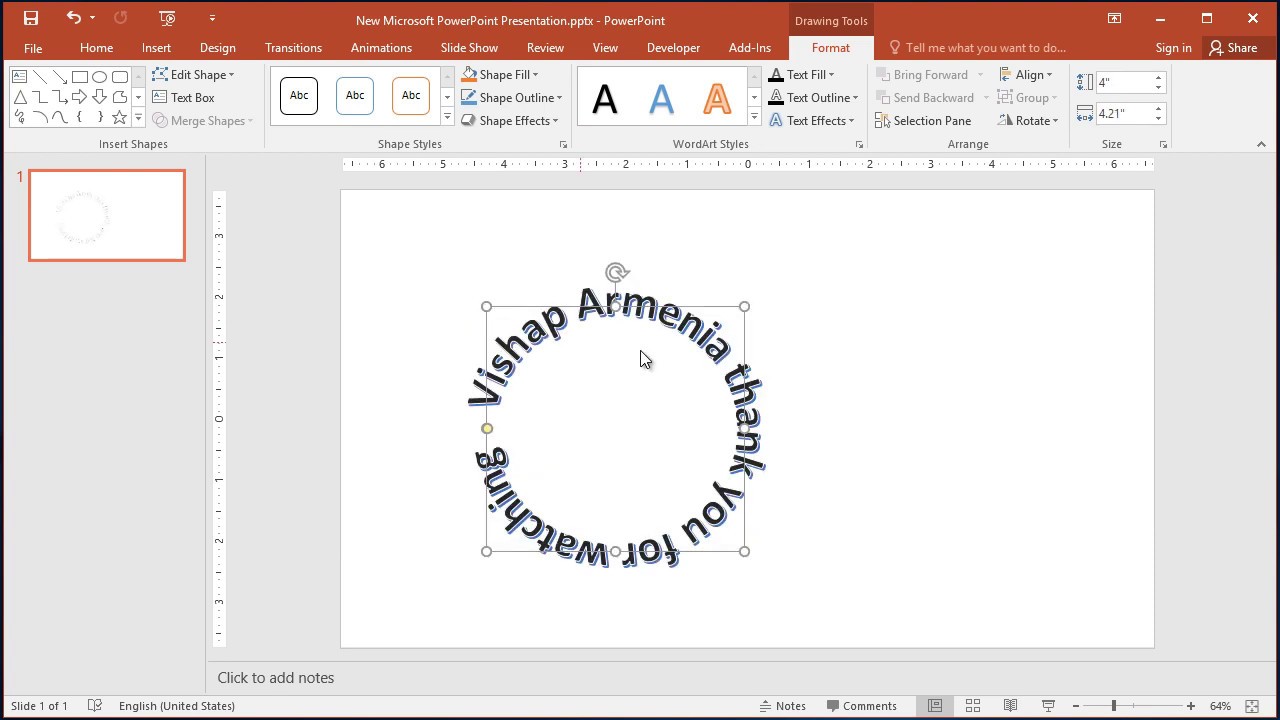
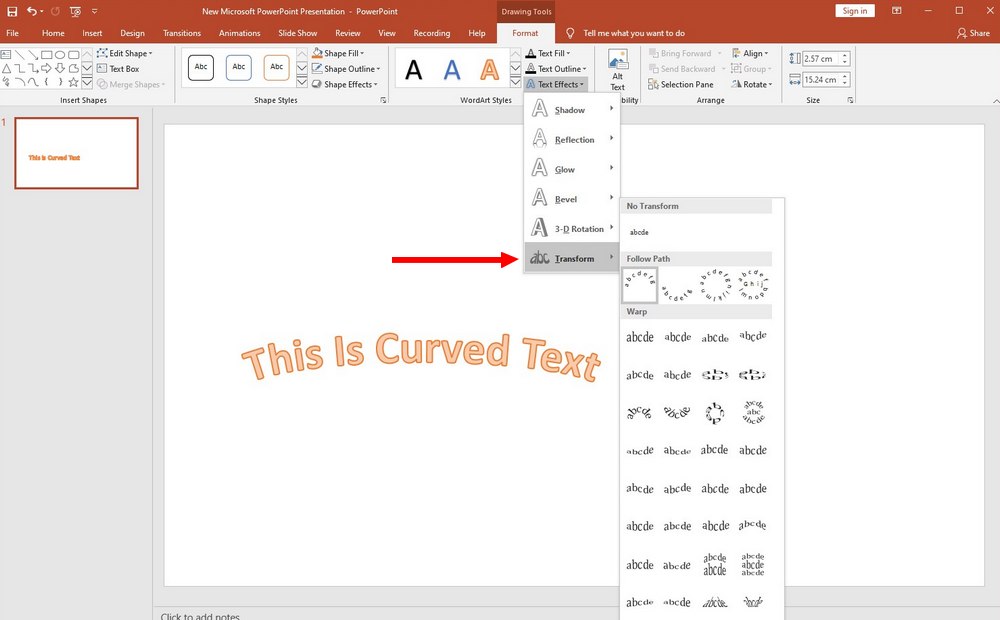
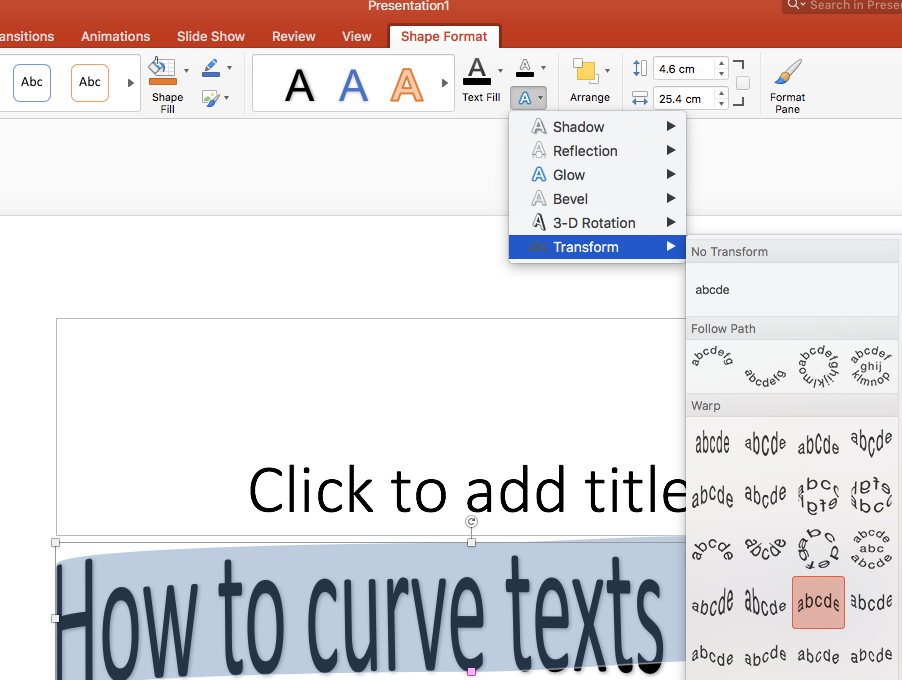
To curve text in PowerPoint, first, select the text in the text box. Then, click on the "Format" tab. Next, click on the "Text Effects" option under "WordArt Styles". From the dropdown, click on "Transform" and choose one of the "Follow Path" options provided as per requirement.

Curved Text in PowerPoint The Step by Step Guide
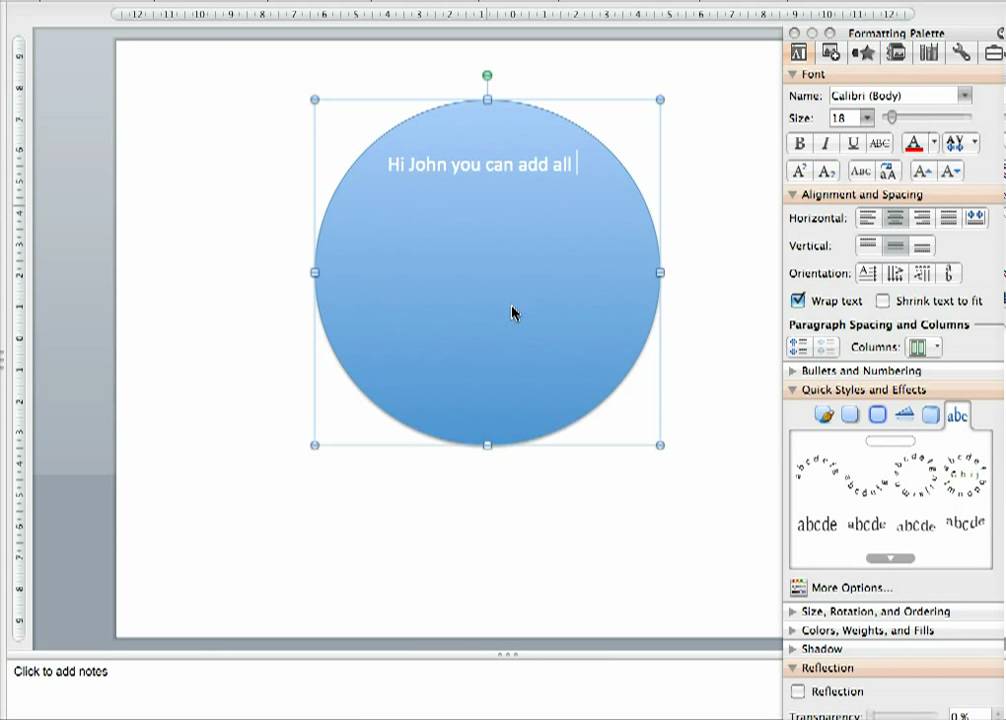
To curve text in PowerPoint using WordArt, follow these steps. Open your PowerPoint presentation and select the slide you want to insert your WordArt effect into. From the ribbon bar, select Insert > WordArt. Select a preset WordArt style you'd like to use—this will allow you to enter your text into a curved shape.

How to Curve Text in PowerPoint? [Everything to Know!] Art of Presentations
Adding curved text in PowerPoint is a simple but effective way of upgrading your presentations. With curved text, you can add a professional touch to your design that can make your presentation more engaging and visually appealing. Curved text can be used in different ways, like adding emphasis to important information, creating design elements.
How to make curved text in PowerPoint YouTube
Curved text can be a great design element that can help draw attention to key points and add visual interest to your slides. In this article, we'll explore the basics of creating curved text in PowerPoint and provide a step-by-step guide to getting started.
How to Curve Text in PowerPoint
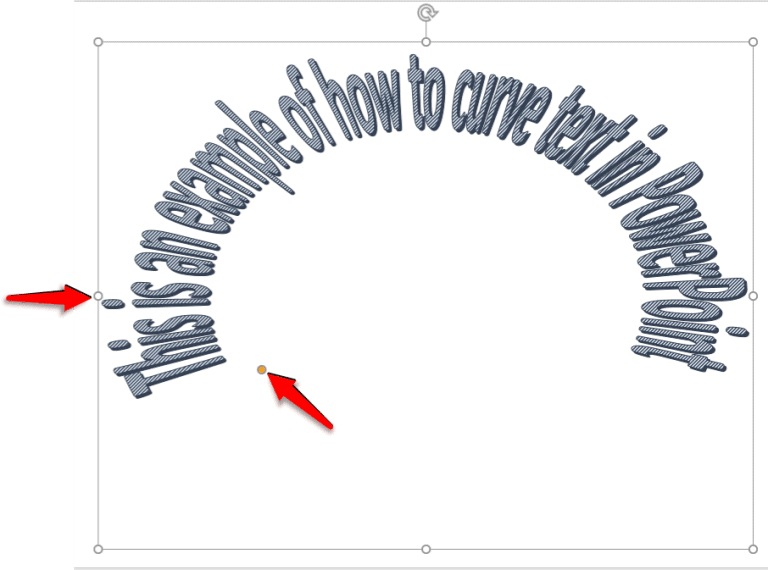
Wrap around a circle To create text that completely circles your shape, choose Circle under Follow Path, and then drag any of the sizing handles until your WordArt is the size and shape you want. Wrap around straight edges To wrap text around a shape that has straight edges, such as a rectangle, insert WordArt objects for each edge.
How to Use Curved Text in PowerPoint
1. Creating a Subtitle When creating a PowerPoint slide, most people add a title. Often there's a subtitle under the title. You could make your subtitle look fun and whimsical by making it PowerPoint curve text. This is a great way to draw your audience's attention to the subtitle. 2. Wrapping Around Images

How To Curve Your Text in PowerPoint YouTube
Curved Text in PowerPoint: The Step by Step Guide Bending PowerPoint Text: Curved Text as Design Element for Your Presentation Want to add some dynamism to your presentation and make your text more engaging? Then the design element called 'PowerPoint Text Bending' might be just the thing for your PowerPoint presentation.
How to Write Circular Text in PowerPoint (Curving Text) YouTube
The first step to creating bent or curved text is to insert WordArt into your presentation. Go to the Insert tab. In the Text group, select WordArt . Choose the style of text to add to your document. You'll customize or change the text style after it's been inserted. Highlight the sample text provided and enter your text. Alter the Text Path
PowerPoint Ultimate Guide for 2020 Theme Junkie
Method #1: Curve plain text Step #1: Open a presentation The text you want to curve must be enclosed in a text box. Let us start with a blank presentation. Step #2: Insert a Text Box Click on the Insert tab in the top menu bar to change the ribbon. In the section Text, click on Text Box. The cursor will change to a cross.
How To Curve A Text In Powerpoint
When to use curved text in PowerPoint Though the standard left-to-right horizontal text is the best choice in most instances, particularly when you want to convey the main points of your presentation, curved text can be useful as an accentuating or functional element in the following instances: Creating a subtitle
curved text in PowerPoint Mac Microsoft Community
Step 1: In your PowerPoint Presentation, navigate to the "Insert" tab and select "Text Box". To position the text box, use your cursor to move where you want the text box to be and then click to place the text box. Step 2: Type in the text you want to curve within the text box. Step 4: Head over to the "Shape Format" tab.

How to Curve Text in PowerPoint? OfficeBeginner
1. Navigate to the Insert section. 2. Click WordArt in the Text group section. 3. Select the text style you want to use in your presentation 4. Now, select all the text that was inserted and enter your own text 5. Navigate to the top ribbon, and choose Format Shape 6. Click the Text Effects drop-down menu, and select Transform 7.
/curvedtextinpowerpoint-d1890d60d16b430186cf6b01bface09c.jpg)
How to Use Curved Text in PowerPoint
To curve text in PowerPoint, you first need to add a text box or WordArt text to your slide. Here's how: For a text box: Go to the "Insert" tab Click the "Text Box" button in the Text group Draw a text box on your slide with your mouse Type or paste your text For WordArt: Go to the "Insert" tab Click the "WordArt" button in the Text group
How to Curve Text in PowerPoint? OfficeBeginner
Curving text in PowerPoint is an eye-catching design technique that can make your presentations more visually appealing and emphasize key messages. By bending text around shapes or images, you can add flair while enhancing readability. In this comprehensive guide, you'll learn: The benefits of curving text in PowerPoint

How to Curve Text in Powerpoint YouTube
Open your PowerPoint presentation and navigate to the slide where you want to add curved text. Click on the "Insert" tab in the PowerPoint toolbar. In the "Text" group, click on "WordArt." Select a WordArt style from the drop-down menu. Type your desired text in the WordArt text box that appears on the slide.
How to Curve Text in PowerPoint Applying Text Effects in PowerPoint YouTube
Adding curved text to your PowerPoint slides is an excellent way to create visual interest, emphasize key points, and take your presentations to the next level. In this comprehensive guide, you'll learn everything you need to know about utilizing curved text effectively. Benefits of Curved Text